macOS · ZMK
See your layers.
Lenny's ZMK Keyboard Overlay
A macOS menu bar utility that shows a live on-screen overlay of your ZMK keyboard layout whenever you switch layers.
A macOS menu bar utility that shows a live on-screen overlay of your ZMK keyboard layout whenever you switch layers.
Features
KeymapOverlay reads your ZMK keymap and talks directly to your keyboard's firmware to know exactly which layer you're on.
Your keyboard reports its active layer state over HID. The overlay appears automatically when you leave the base layer.
Point it at your .keymap file. It parses layer names, bindings, and custom annotations — no manual config needed.
Add custom icons and labels to keys with inline comments in your keymap. Uses SF Symbols for a native macOS look.
Translucent, draggable overlay. Looks pretty good.
Built-in Sparkle updater keeps the app current. Watches your keymap file for changes too — edit and see results instantly.
Lives in your menu bar. Shows connection status, lets you toggle the overlay, and opens settings with one click.
v1.0
This is version 1.0
Currently supports the Corne (3×6+3) split keyboard layout. More layouts are coming soon.
The ZMK module has been tested on the nice!nano v2 controller. It will likely work on other ZMK-compatible controllers, but hasn't been verified yet.
Requires macOS 26 (Tahoe) or later.
Get Started
The overlay needs to talk to your keyboard. A small ZMK module sends layer state over HID, and the macOS app listens and renders the overlay.
From the root of your ZMK config repo, run:
bash -c "$(curl -fsSL https://raw.githubusercontent.com/lennyitb/zmk-layer-report/main/install.sh)"
This updates your west.yml and board .conf file automatically. For split keyboards, the installer will ask which .conf to use — pick your main half (e.g. corne_left.conf).
Build your firmware as usual. The module is pulled in automatically by west. Flash the resulting .uf2 to your main half.
Open KeymapOverlay.app from your Applications folder. The Settings window will appear on first launch.
Click Browse and select your ZMK .keymap file. The app parses it automatically to understand your layers and key bindings.
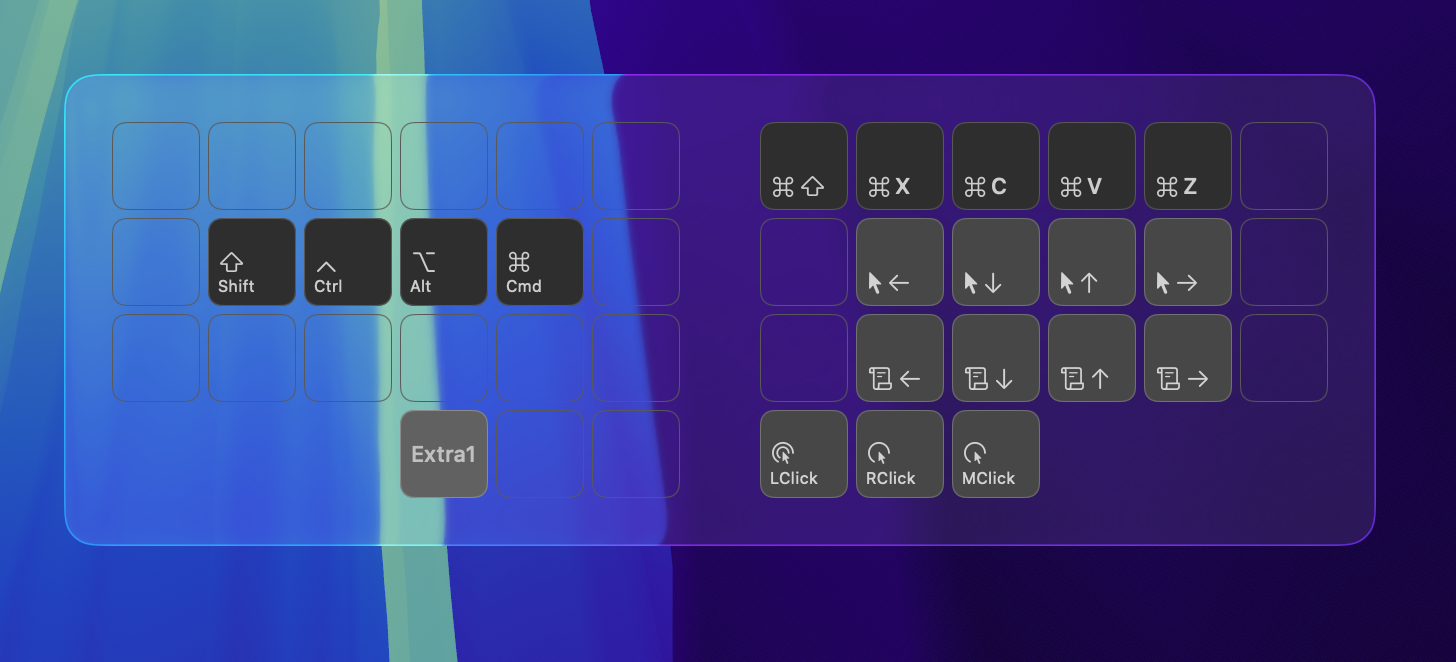
Switch to a non-base layer on your keyboard. The overlay appears with your key labels, color-coded by type. Drag it wherever you like — position and scale are saved between sessions.